
Start
Getting Started
Create a free service, get its credentials, make the first request and connect your web or mobile app with the Kit. About five minutes, no card.
In five minutes you will have a service running, its credentials in hand, and your first request answered. The free tier needs no card.
1. Create a service
Sign in at https://cloud.restheart.com and click Create Service. Pick a tier. Free is enough to build and test an app, and you can change it later.
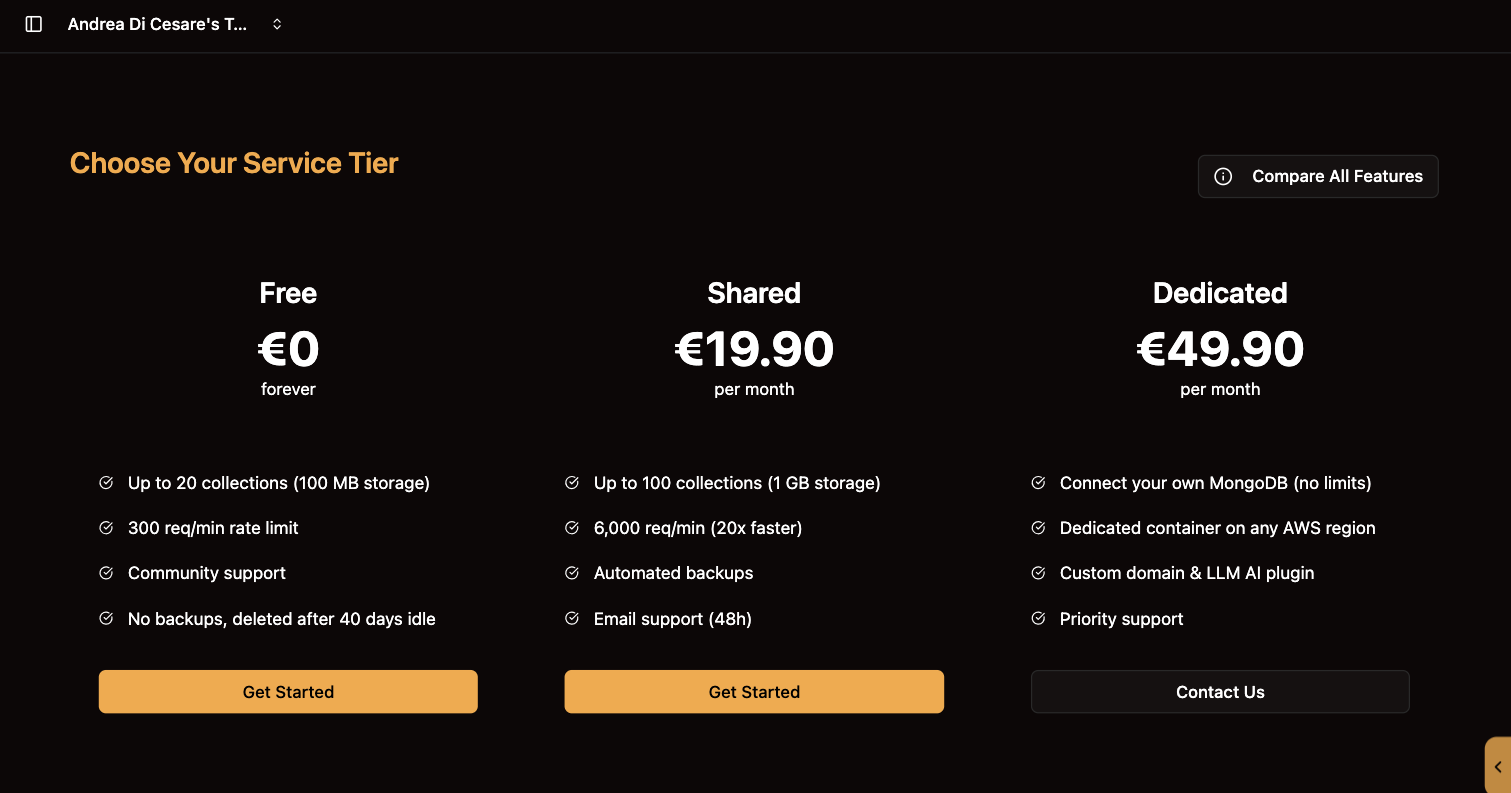
Give the service a name. It is ready in under a minute, with an address of its own such as https://f3a9c1.eu-central-1-free-1.restheart.com" class="bare">https://f3a9c1.eu-central-1-free-1.restheart.com. That address is what your app talks to.
|
Note
|
A Dedicated service needs a MongoDB of yours before it can start, for example an Atlas cluster. See Connecting your MongoDB. |
2. Get the credentials
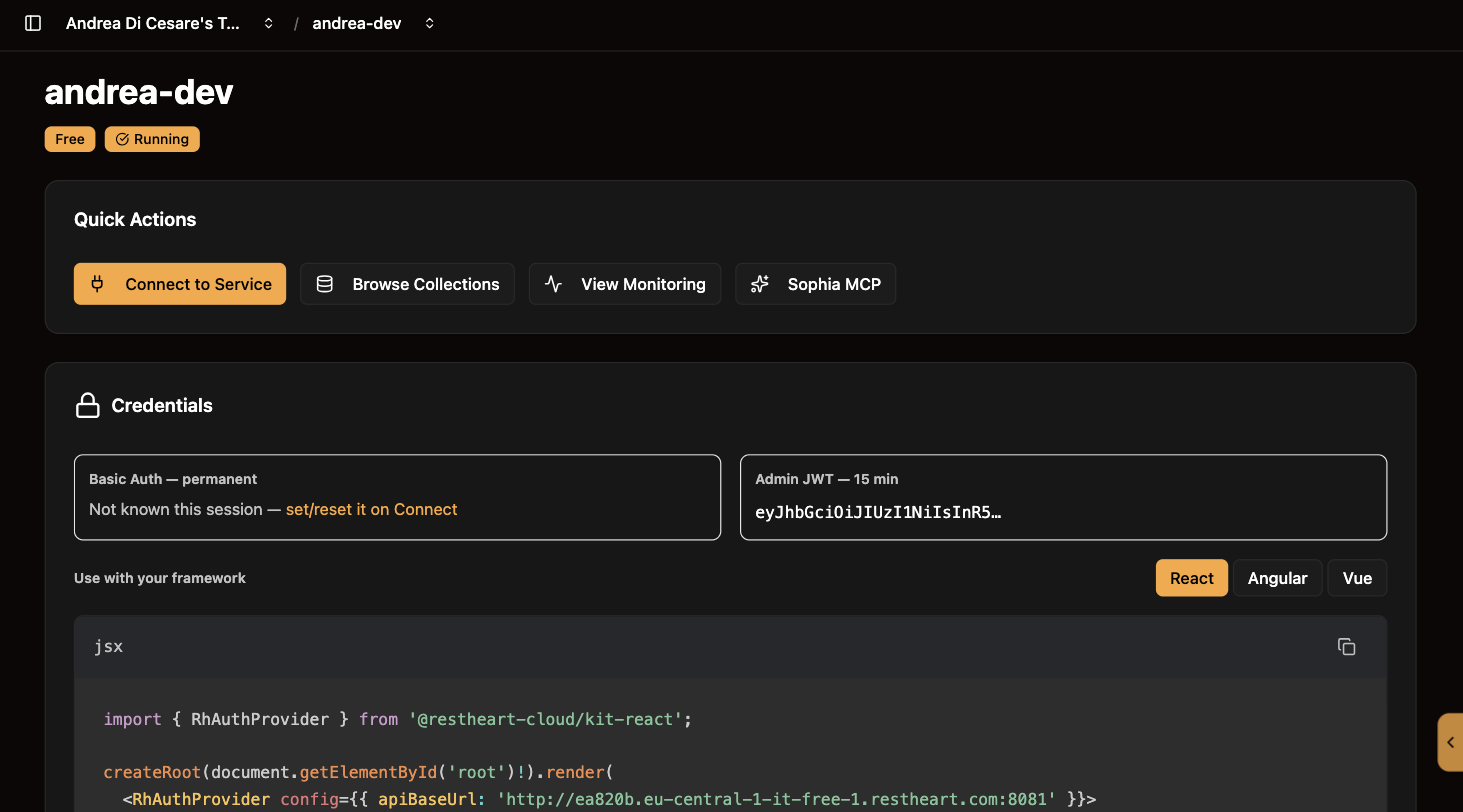
The service opens on its Overview: the address, two credentials, and a snippet for your framework.
-
Basic Auth, permanent. The
rootuser of your service, which can do everything. Use it to set the service up and from your terminal. Your app’s own users come from sign-up, later. -
Admin JWT, 15 minutes. A token with root’s powers for a quick test from a terminal. It expires by design; click Refresh for a new one.
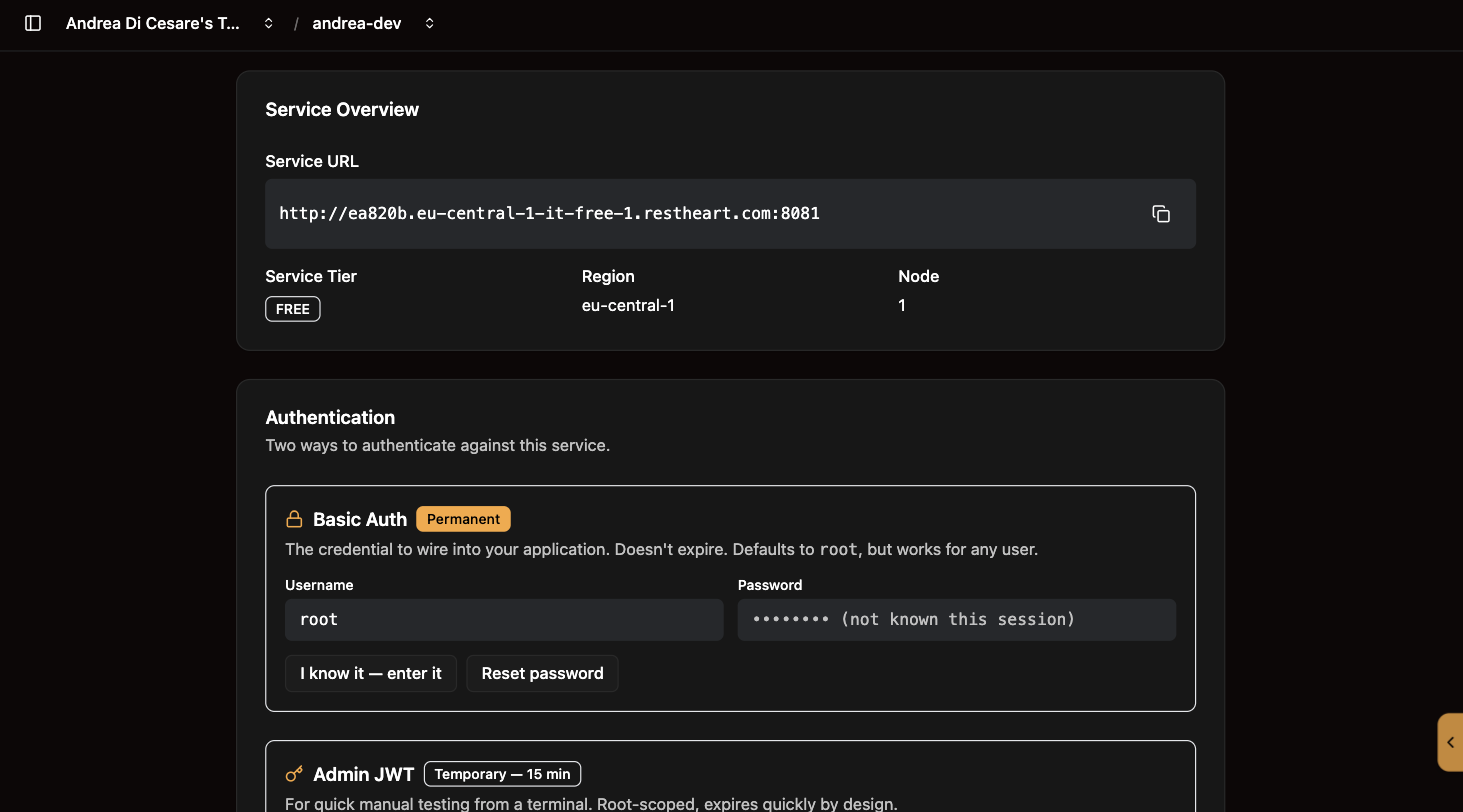
The password of root is not stored anywhere, so the console cannot show it. Open Connect, click Reset password and choose one. Write it down: this is the credential you will use in every example of this documentation.
3. Make the first request
From a terminal. Put the root password in a variable once; every example in this documentation reads it from there:
export ROOT_PASSWORD='the password you set on Connect'

curl -i -u root:$ROOT_PASSWORD https://f3a9c1.eu-central-1-free-1.restheart.com/
It answers 200 and the list of collections, which is empty. Now create one, put a document in it and read it back:
curl -i -u root:$ROOT_PASSWORD -X PUT https://f3a9c1.eu-central-1-free-1.restheart.com/todos

curl -i -u root:$ROOT_PASSWORD -X POST https://f3a9c1.eu-central-1-free-1.restheart.com/todos \
  -H 'Content-Type: application/json' \
  -d '{ "task": "Try RESTHeart Cloud", "completed": false }'

curl -u root:$ROOT_PASSWORD https://f3a9c1.eu-central-1-free-1.restheart.com/todos
Three requests, and your app has a collection with data in it. Every collection works this way: GET to read and filter, POST to add, PATCH to change, DELETE to remove. See Collections and documents.
|
Tip
|
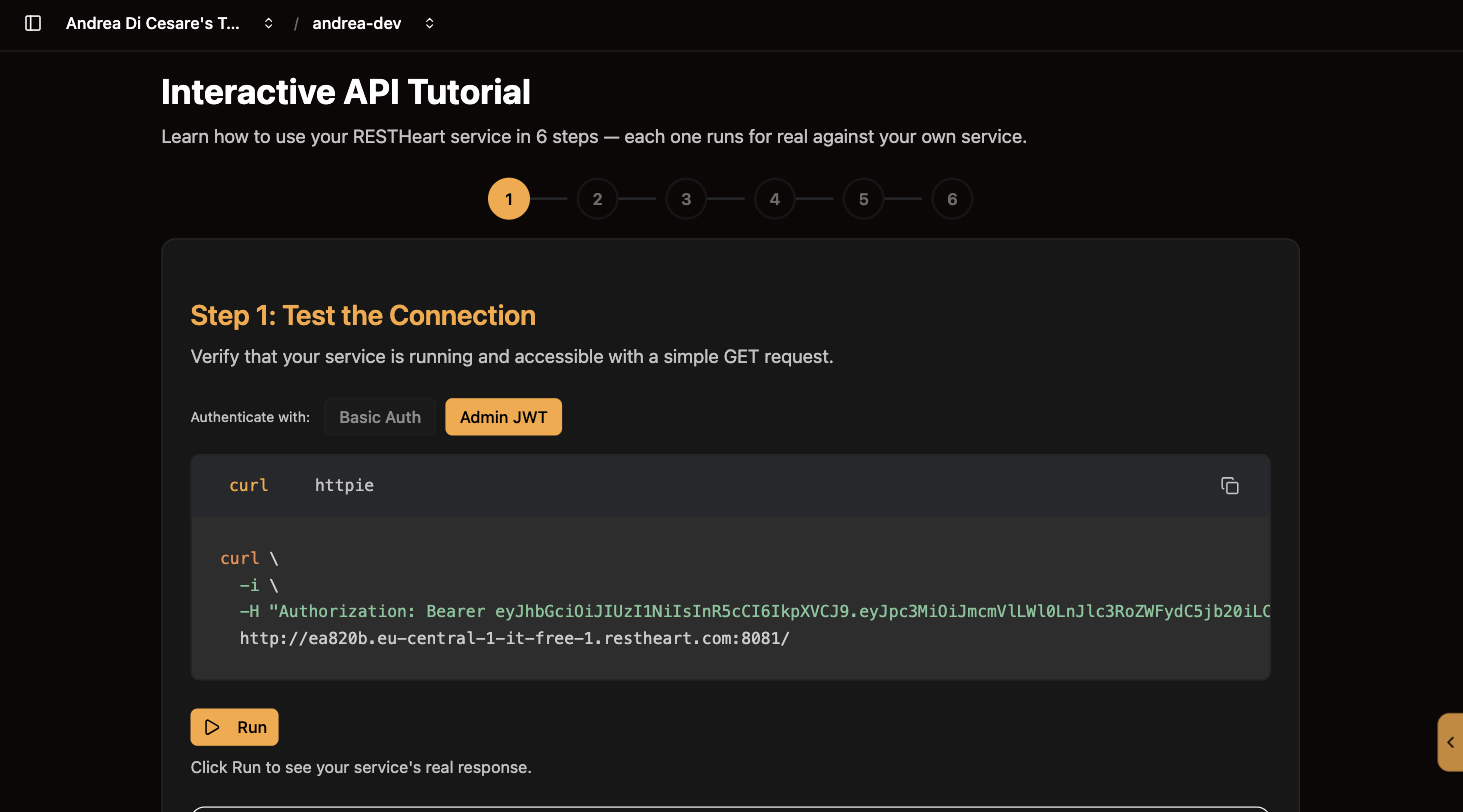
The API Tutorial in the console runs these steps against your service with one click each, then goes on to create an application user and give it a permission. |
4. Connect your app
Install the Kit for your framework and paste the snippet shown on the overview under Use with your framework:
npm install @restheart-cloud/kit-react # or kit-ng, or kit-vueimport { RhAuthProvider } from '@restheart-cloud/kit-react';
createRoot(document.getElementById('root')!).render(
<RhAuthProvider config={{ apiBaseUrl: 'https://f3a9c1.eu-central-1-free-1.restheart.com' }}>
<App />
</RhAuthProvider>
);From here your app has sign-up, sign-in, sessions that survive a reload, and the calls to your data. The users are the users of your service, each with their own permissions, never root. See the Cloud Kit, or start from a ready-made app:
git clone https://github.com/SoftInstigate/restheart-cloud-starter-react.gitA mobile app talks to the same address over HTTPS, with the user’s credentials or a token. See Users and permissions through the API.
What next
-
Your users. Turn on sign-up management for registration, email verification, password reset and login with Google. Then users and permissions decide who may do what.
-
Your data. Schemas to validate documents, aggregations for reports, change streams for live updates in the UI.
-
Payments, email, AI. Stripe billing, email from your own address, and the MCP server to let an agent use your data.
The free tier gives you 20 collections, 100 MB and 300 requests a minute, and a service idle for 40 days is deleted. What changes with Shared and Dedicated.
Stuck? Ask on Discord, or open a support request from the console.